2nd Gen RX-7 FC Belt OEM Radio Belt Replacement
Introduction:
So you want to keep your factory radio in your S4 FC RX-7? Great choice, it's easily the nicest looking radio for the car. That said, you might want to listen to more than FM radio, and if you haven't noticed Cassette tapes are making a bit of a comeback. Picture this: you buy a new shiny tape and insert it into your 7 to jam on a nice drive, and instead of inserting the tape gets jammed or doesn't slot in at all! This is because the belts have probably turned into a tar-like goo, which is very common on old tape decks. Today, I'm going to show you how to fix it!
Here's what you need:
- Square Belt 15.2" x 0.039"
- Square Belt 2.7" x 0.047"
- Isopropyl Alcohol
Step 1: Disassembly
First, you need to remove the cassette deck from its spot in the centre of the radio stack. To do this, just remove all the screws and pull off the brackets. Be warned these screws strip easily (goes for this entire unit), so be careful! Then you just need to unplug the wires going out of the tape deck.
Next, we need to get to the internals. This is quite easy, as the radio just has a lid that is friction fitted on. Take a plastic spudger (or a flat blade screwdriver, just be careful) and remove the lid.
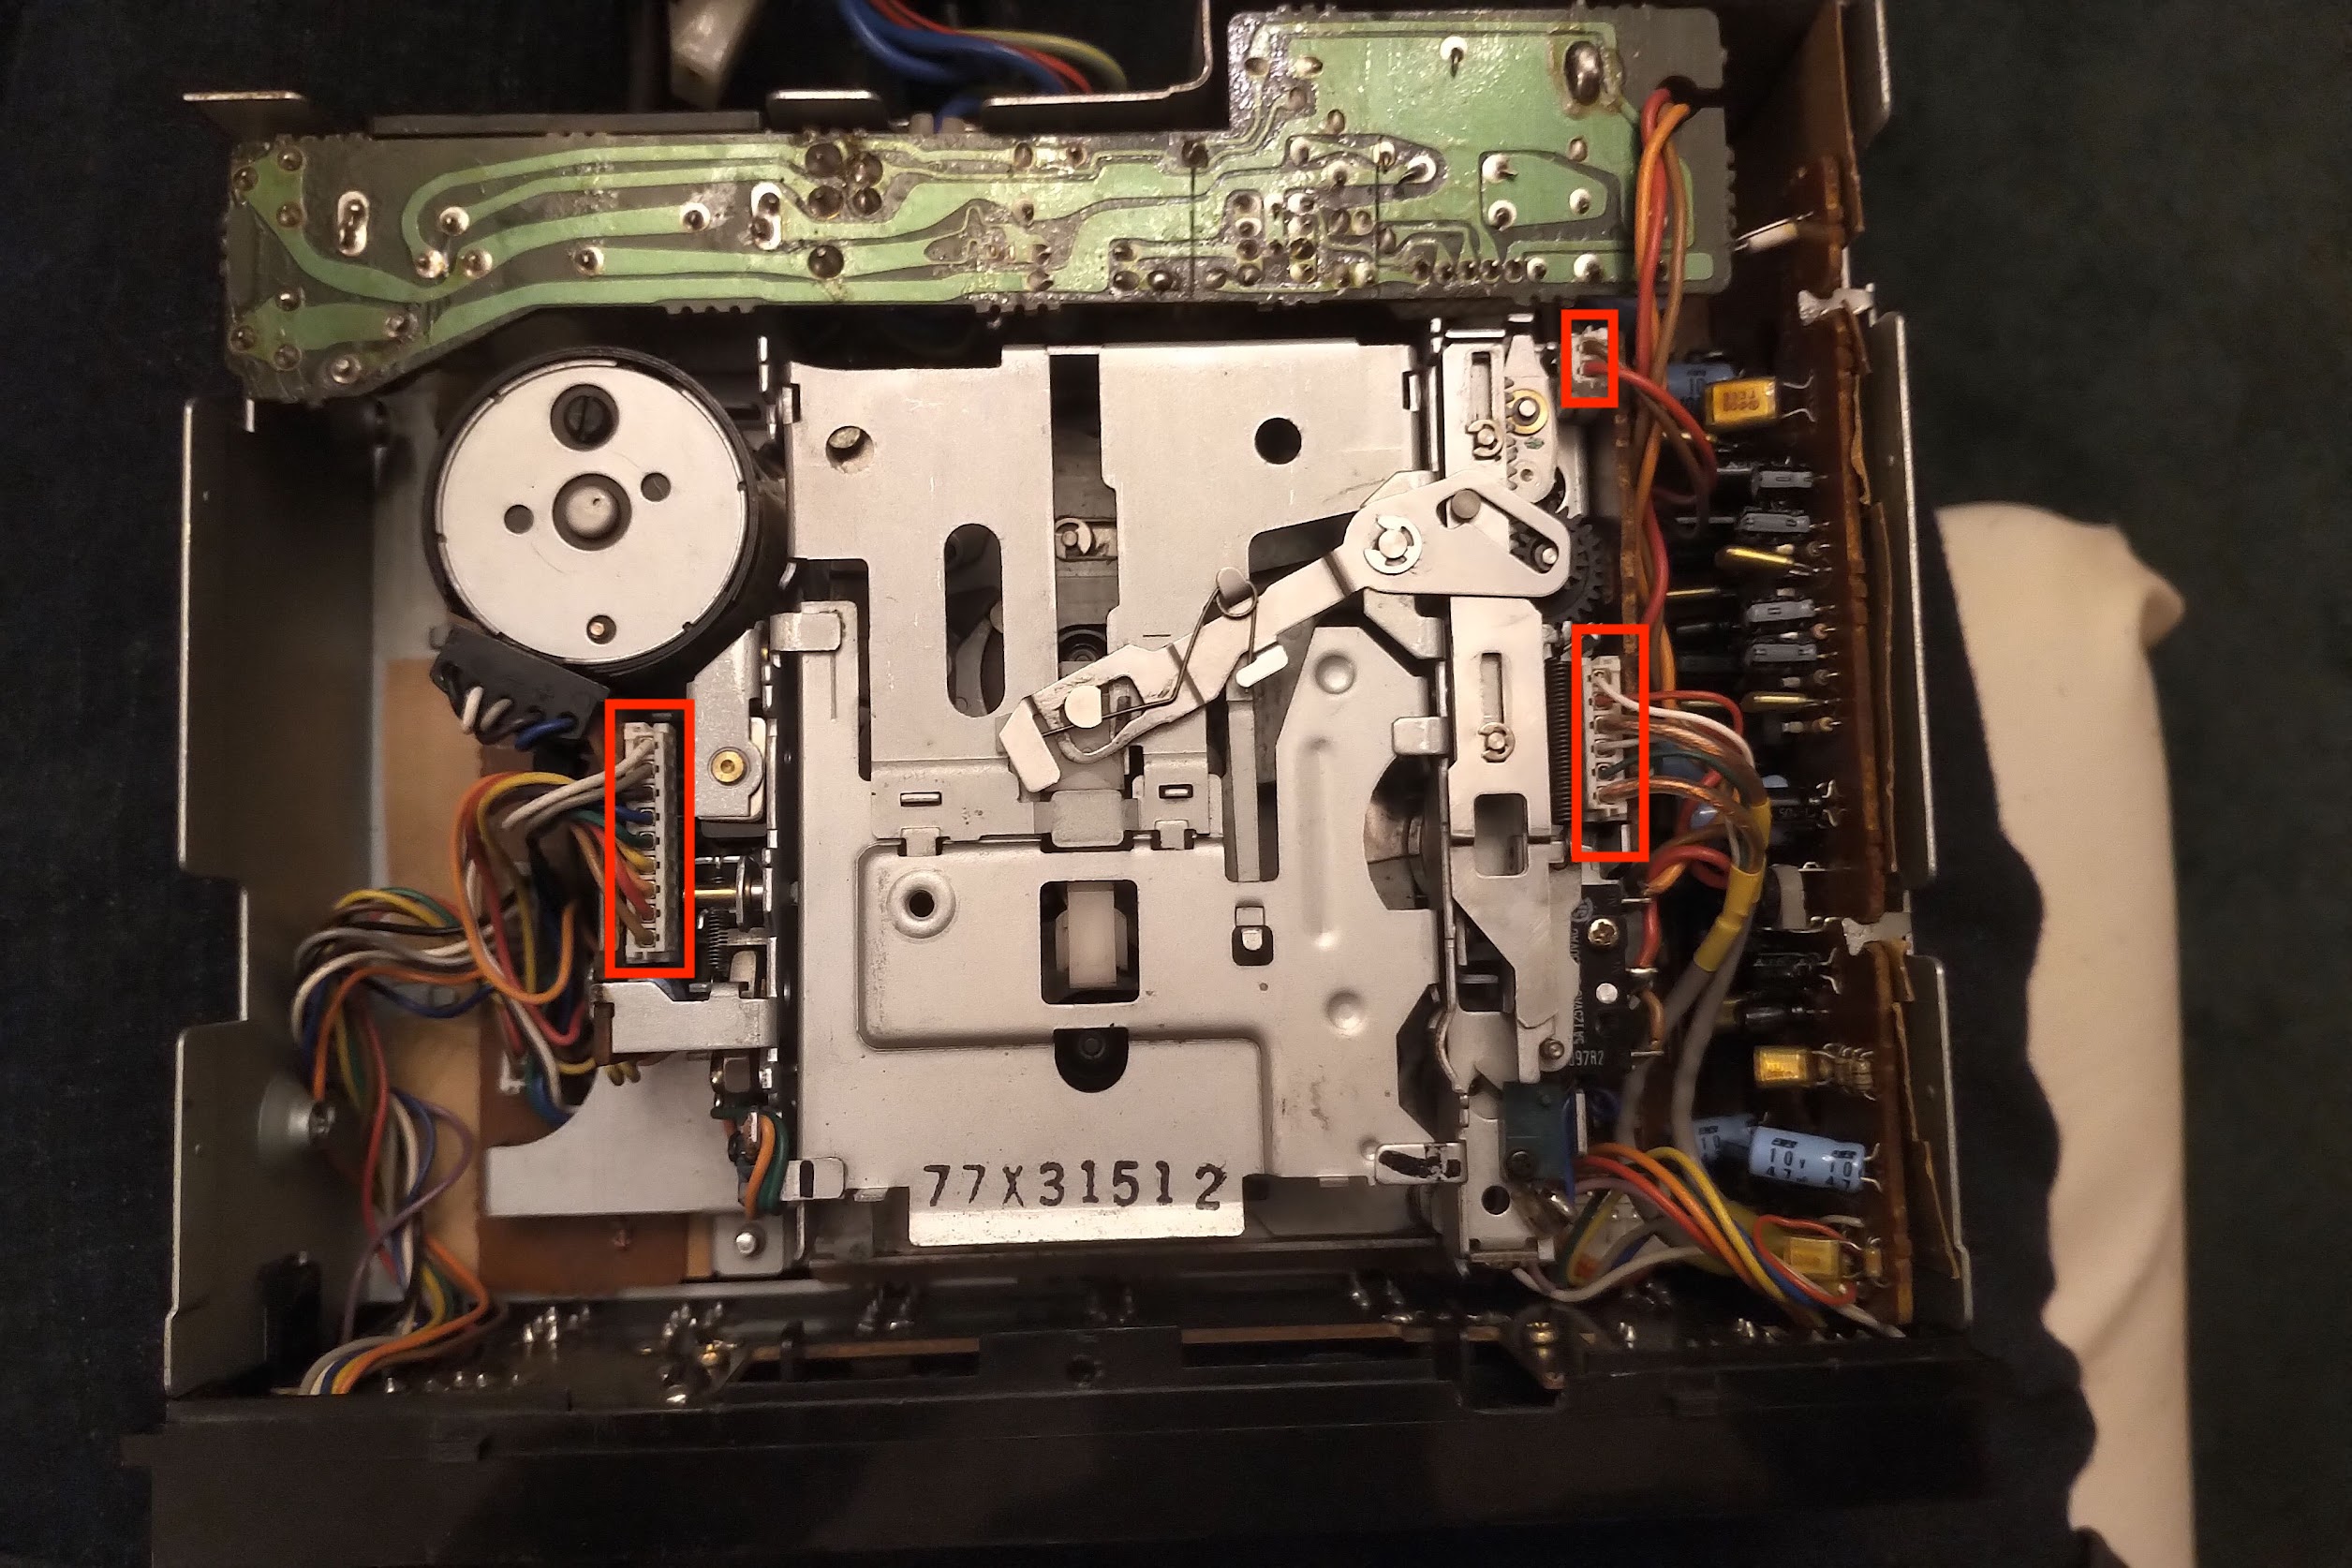
Disconnect the connectors I've highlighted here on the mechanism.
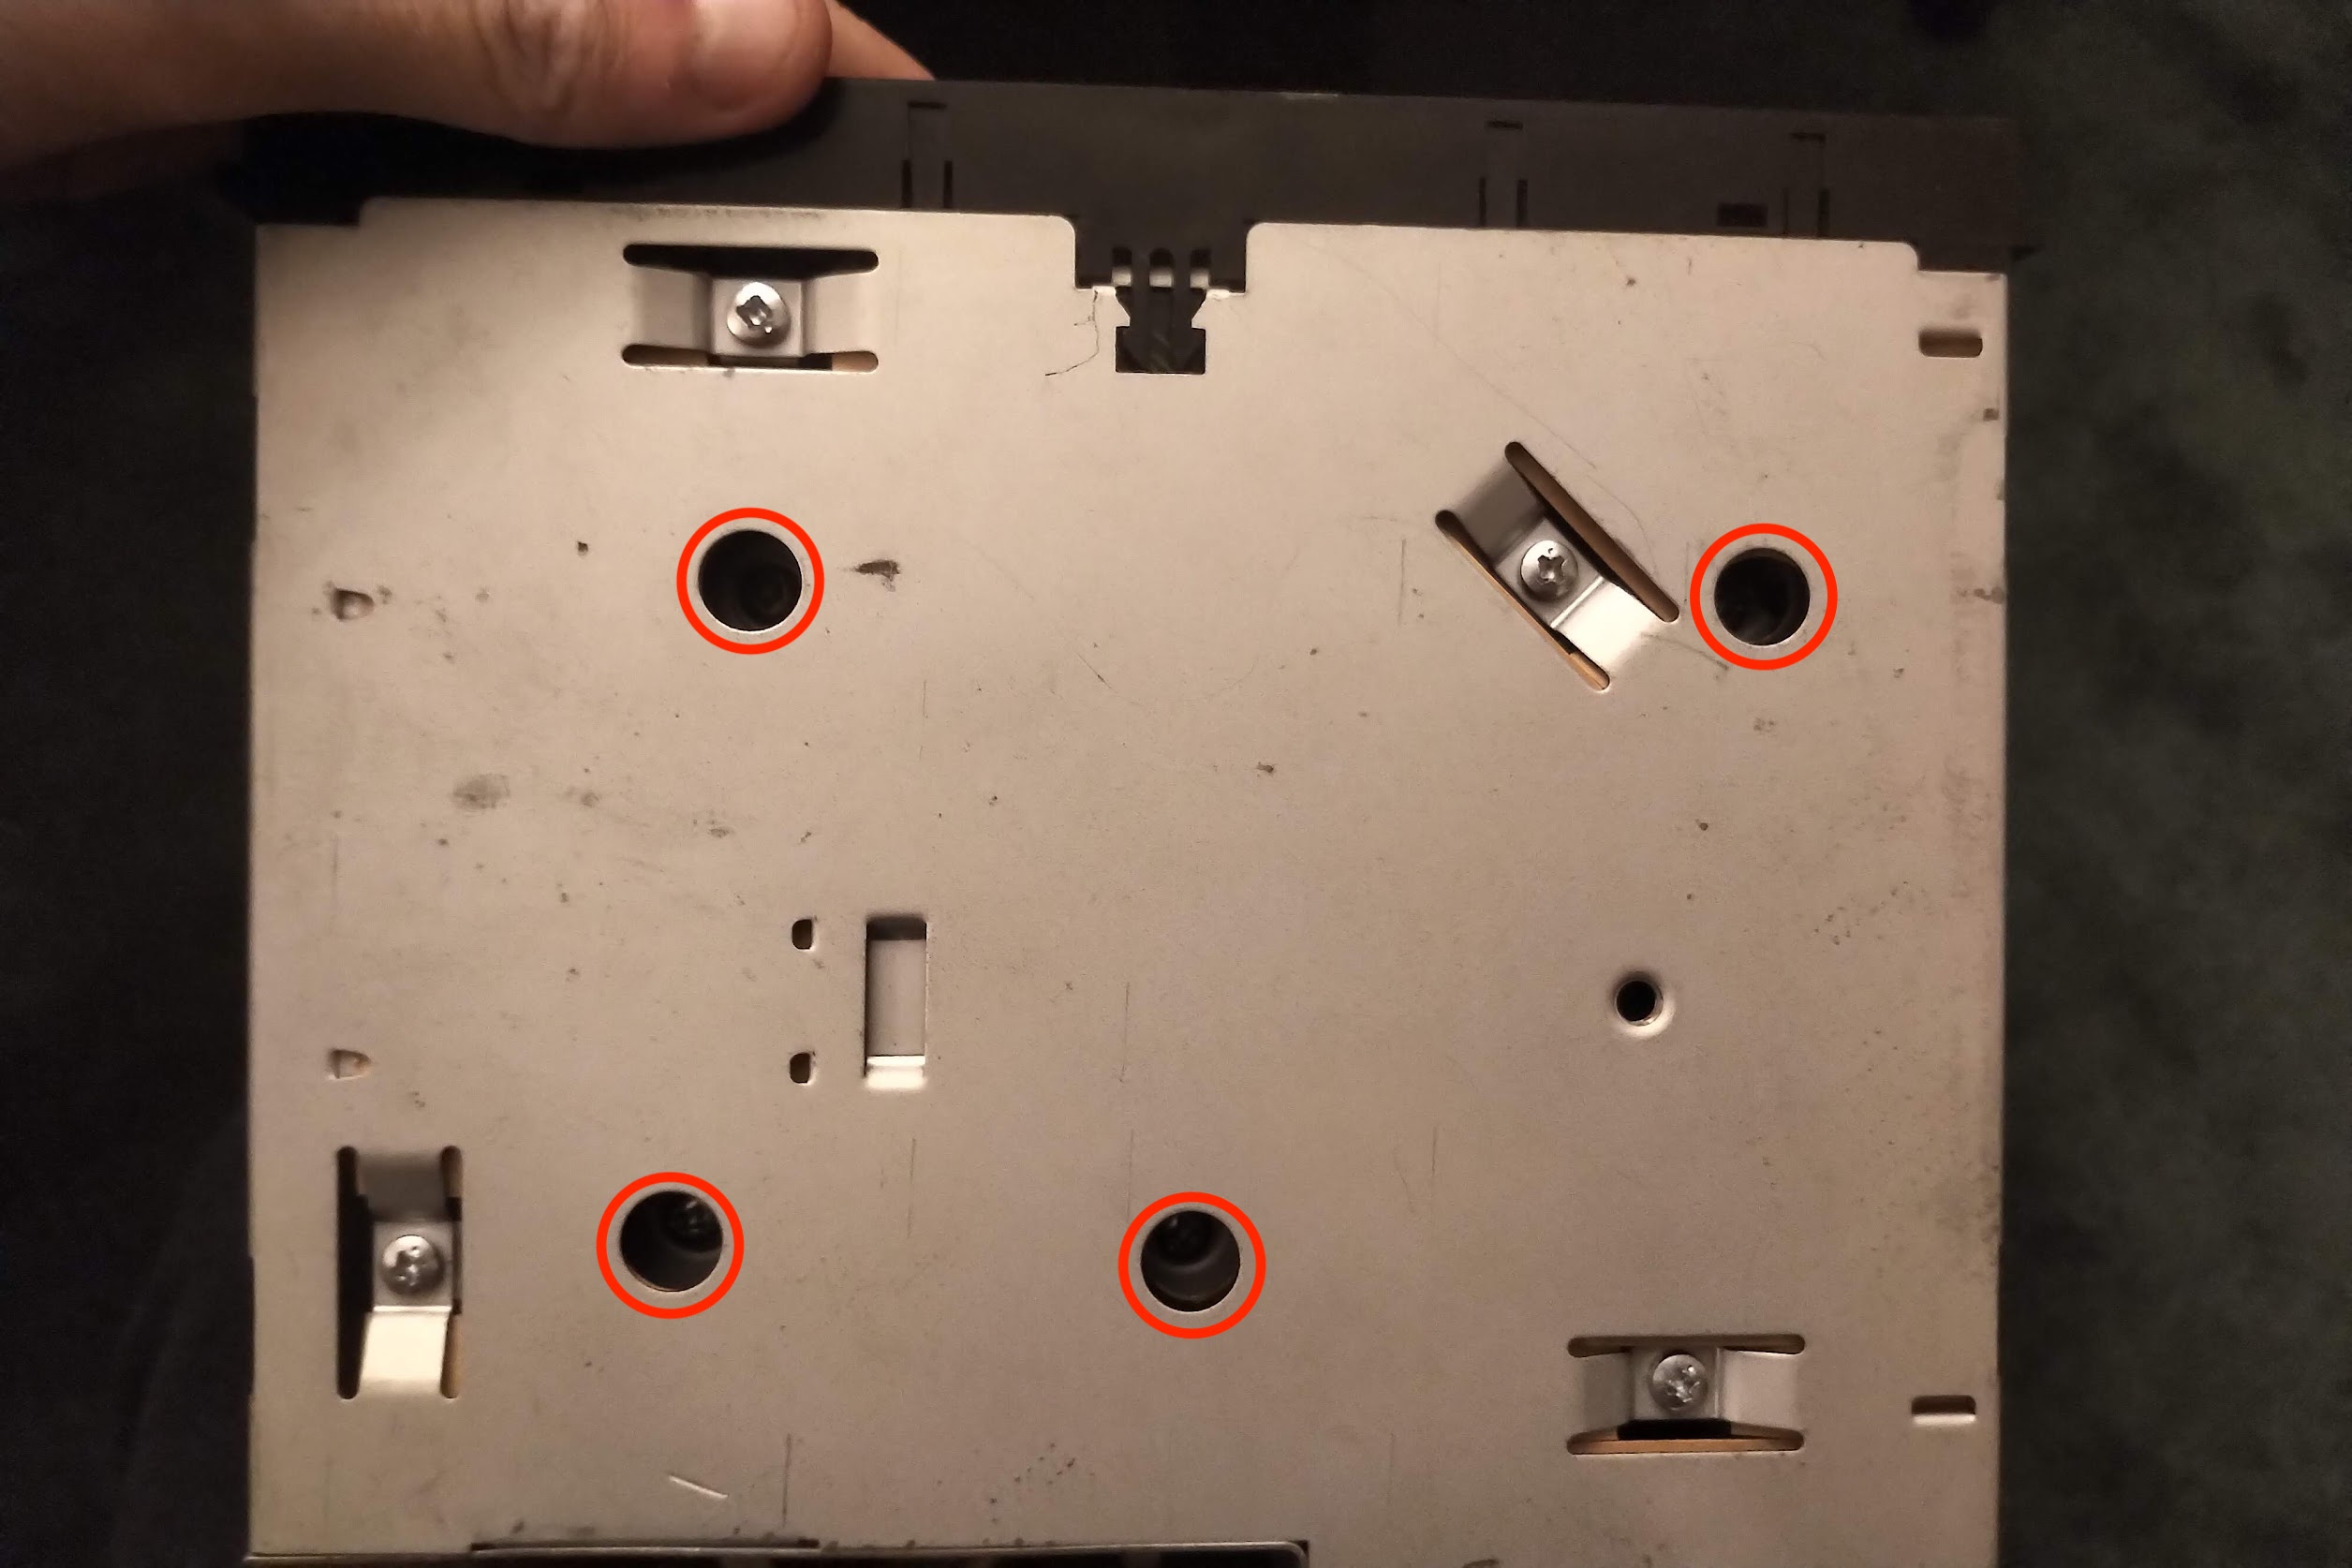
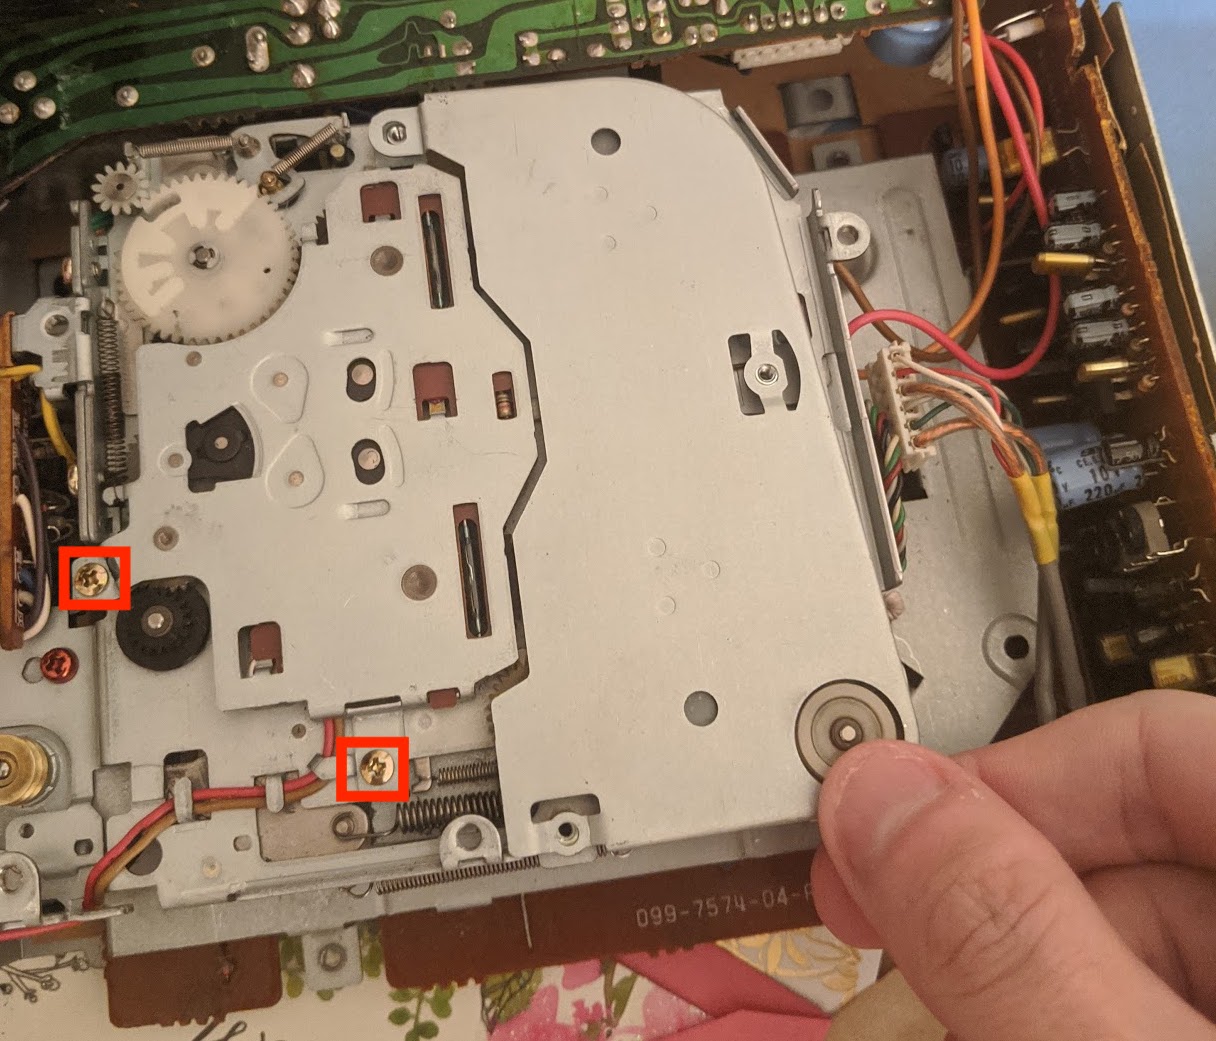
Lovely! Now, turn over the cassette deck and remove the recessed screws highlighted.
Great, now the mechanism should be free. It still is attached to the logic board, so make sure not to yank the wires off! Just carefully lift it out of its chassis and on to the table beside it.
Step 2: The Belts.
This one is a bit tricky, but isn't super bad. Just follow along with these directions.
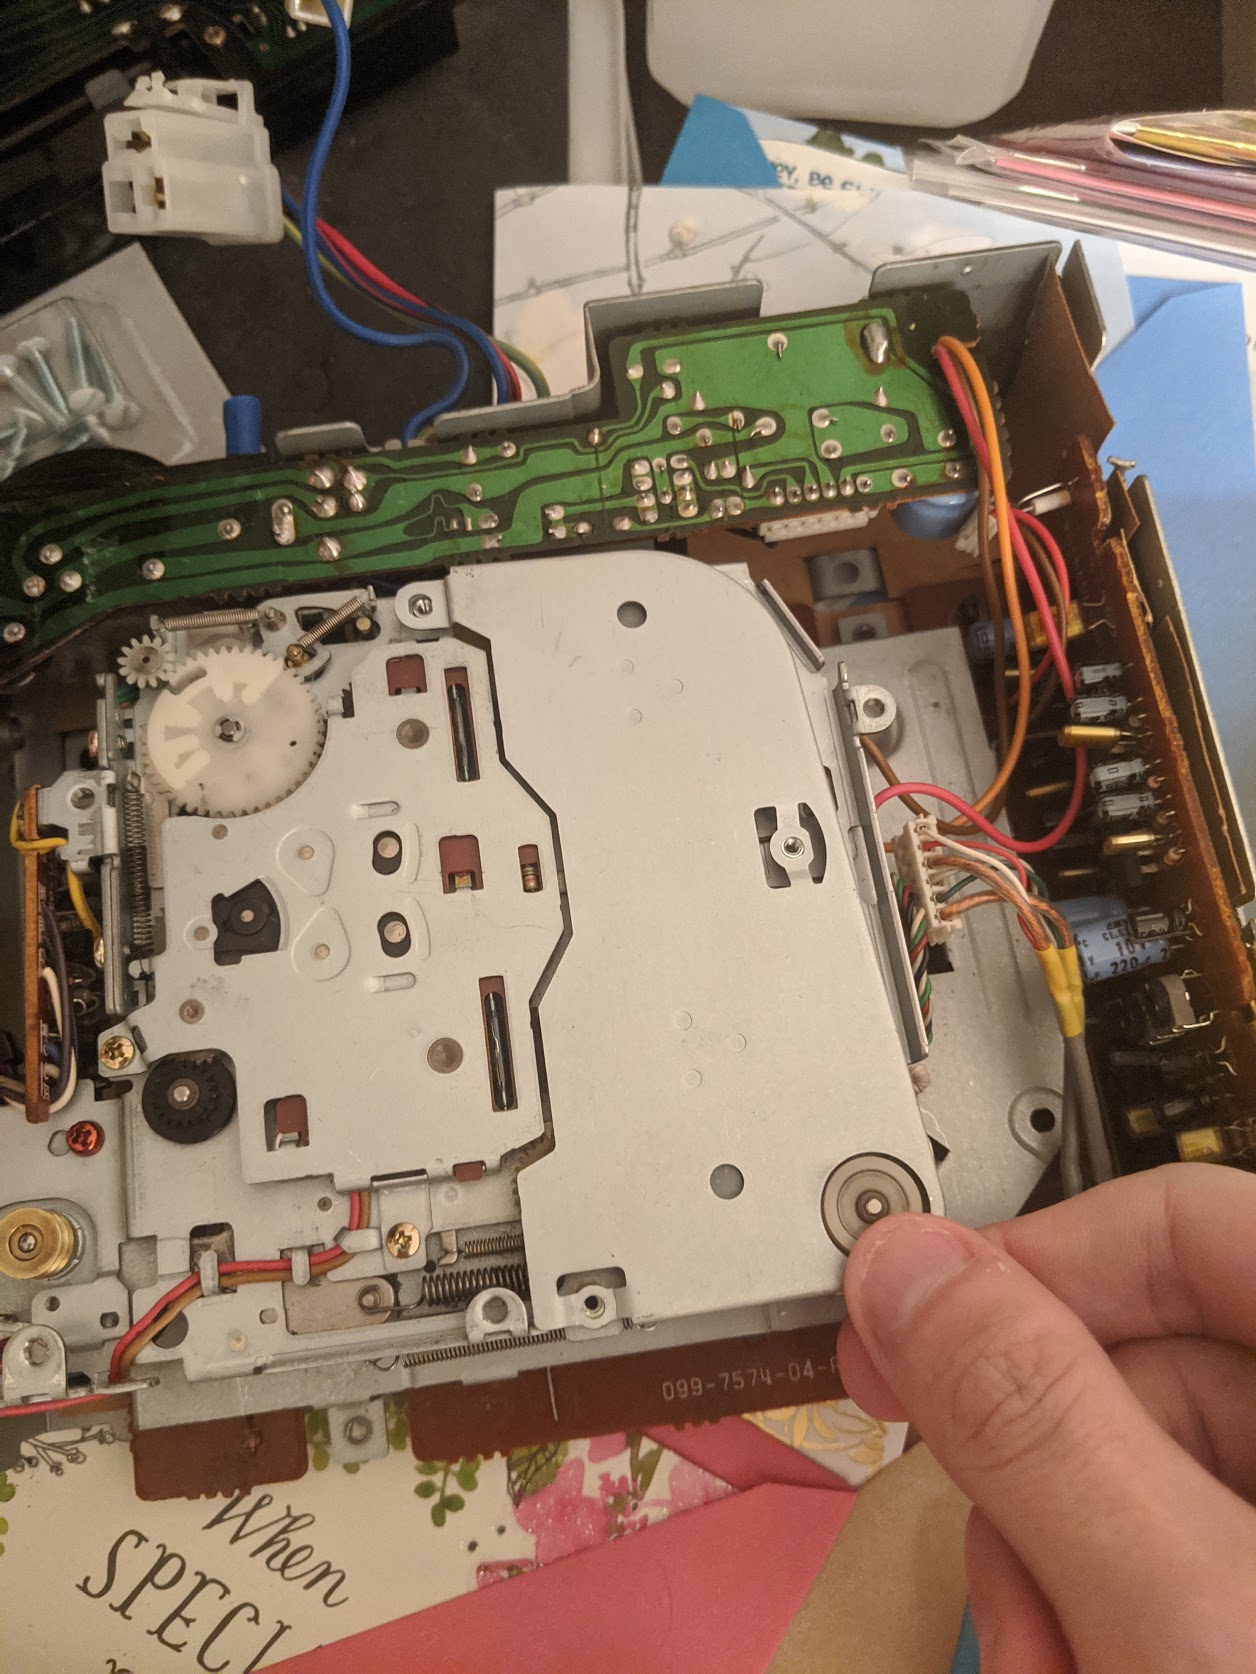
First, remove the rear beltway cover. It's held in by three screws.
Now, you will probably see the gunk the old belt left behind. Pull out some rubber gloves, isopropyl alcohol, paper towels, and Q-tips. This is going to get messy. You need to remove as much belt gunk as possible, including from the grooves of the wheels. I find a knife helps a lot with this. It's sticky so it isn't super ez, but it's well worth your time to get it off.
Once you're done cleaning, you need to install the new belts. You probably don't even know where they went! Luckily, I made a handy tape path guide just for the occasion!
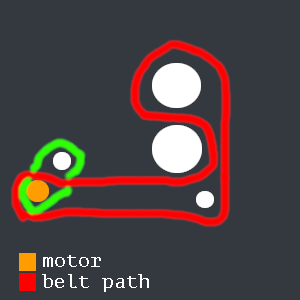
First, install the smaller belt (green on this diagram). Getting it on the motor spindle is easy enough, but that about the other spindle? Well, you need to life up the winding mechanism to do it. First, remove these two screws.
Next, lift up on the cover. You should get just enough room to get the belt onto the spindle. Be careful to not move the cogs too far from their original spots. When it's in place, screw back down the cover and place the belt over the low indentation on the motor spindle. It should now be level.
Now for the larger belt. This one is pretty self explanatory. Make it go across the red path listed in the diagram.
Once you do that, you should clean the head while everything is open like this. Simply take a Q-Tip, dip it in alcohol, and rub it over the cassette head. The brown stuff that comes off is particles from tapes long since played, which will dull your signal.
After that, you're good to reassemble. Some companies charge $200 to do this work, but you've done it for $25 give or take!
If you need any more advice or help, let me know at zeke@zekial.io. Thanks for reading!